Windows 11 has improved dramatically since it was first released, mostly because Microsoft has slowly implemented changes based on user feedback. Despite those gains, there are still some glaring issues I have with the Windows 11. Luckily, they can be fixed with a few easy registry tweaks.
These particular registry tweaks are unlikely to cause problems even if they go horribly amiss, but in general, fiddling with the Windows Registry can break things. I’d recommend making a backup of the Registry before tinkering with anything.
Bing search is fully integrated into the Windows 11 Start menu search by default. If you type exactly what you’re looking for, then you won’t have a problem—you’ll probably only get the desired result.
However, I don’t type perfectly. That means occasionally mistyping a search results in the Start Menu displaying Bing results, which I’m quite literally never interested in. If I wanted to search the internet, I’d launch a browser.

This Open-Source App Made Me Abandon the Windows Start Menu
Don’t get bogged down by Bing search or ads in the Start Menu anymore.
Unfortunately, Windows doesn’t provide a convenient way to disable Bing search from within the Settings Menu (or any legacy menus, for that matter). However, you can disable it by tweaking the Registry.
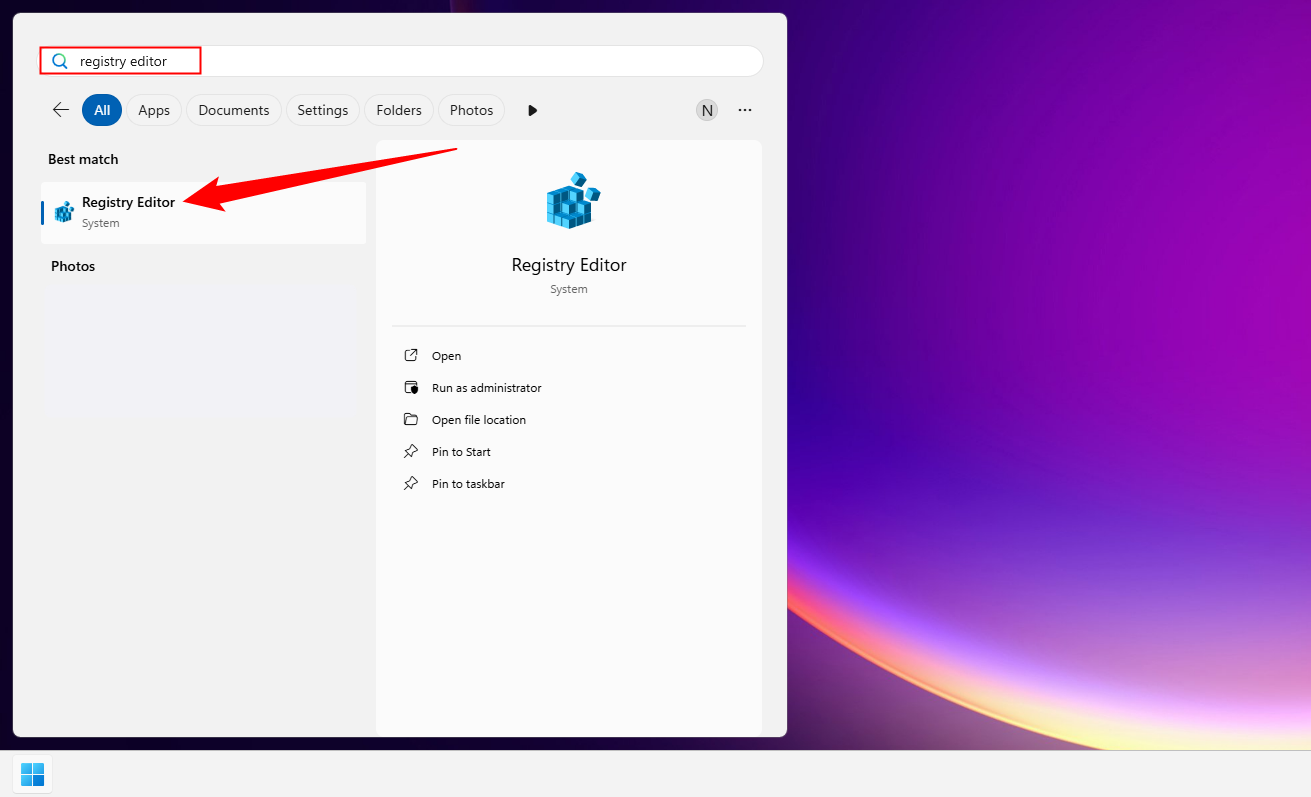
First, open the Start Menu and search for Registry Editor, then launch the program. Your main display is basically a registry browser that works very similarly to File Explorer.
In that case, navigate to Computer > HKEY_CURRENT_USER > SOFTWARE > Policies > Microsoft > Windows. Alternatively, just paste the following g path in the address bar at the top:
Computer\HKEY_CURRENT_USER\SOFTWARE\Policies\Microsoft\Windows
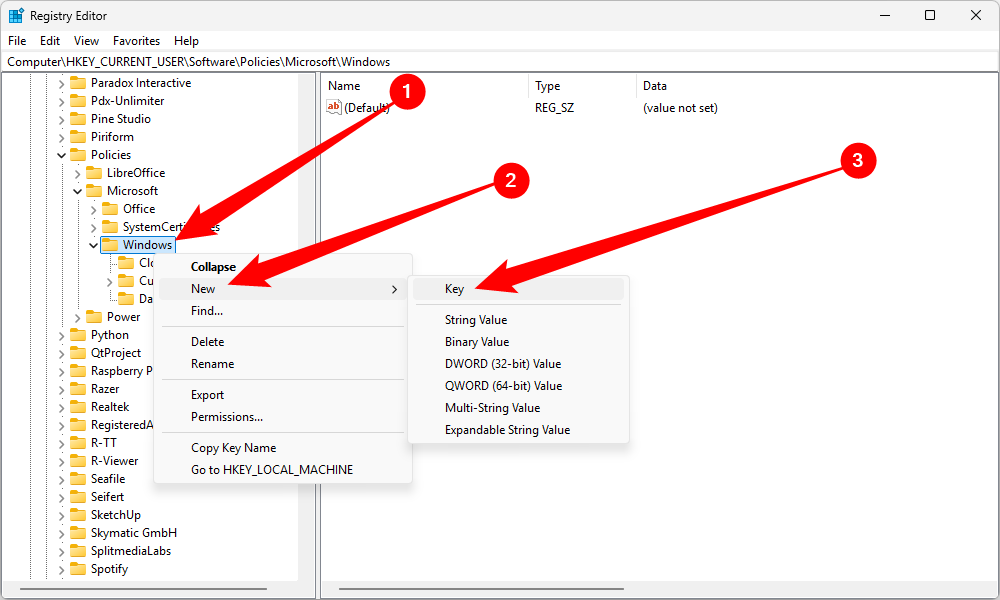
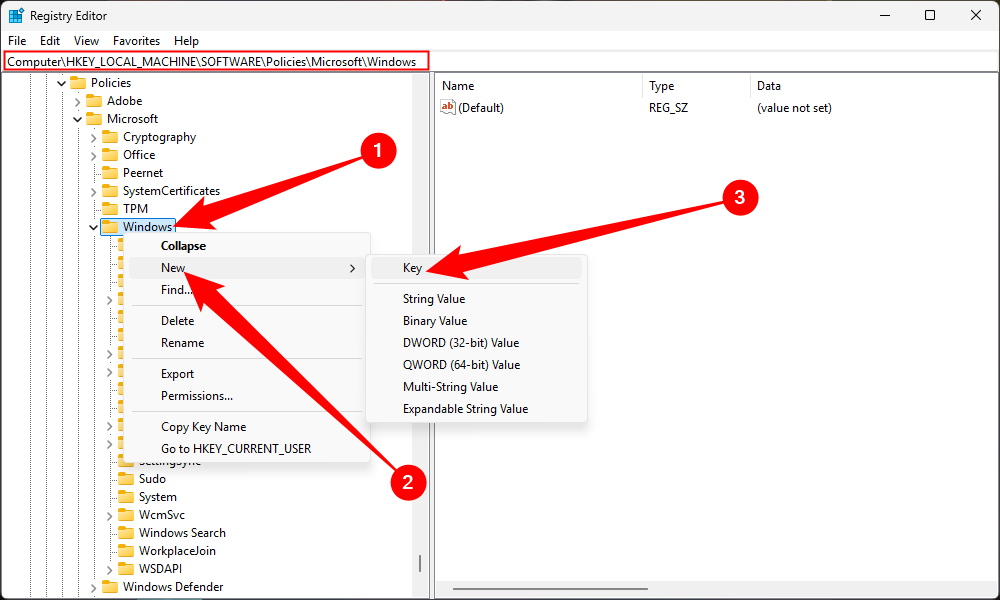
If you have a key named Explorer, just open it. Otherwise, you’ll need to create it. Right-click “Windows,” then select New > Key, and name the new key Explorer.
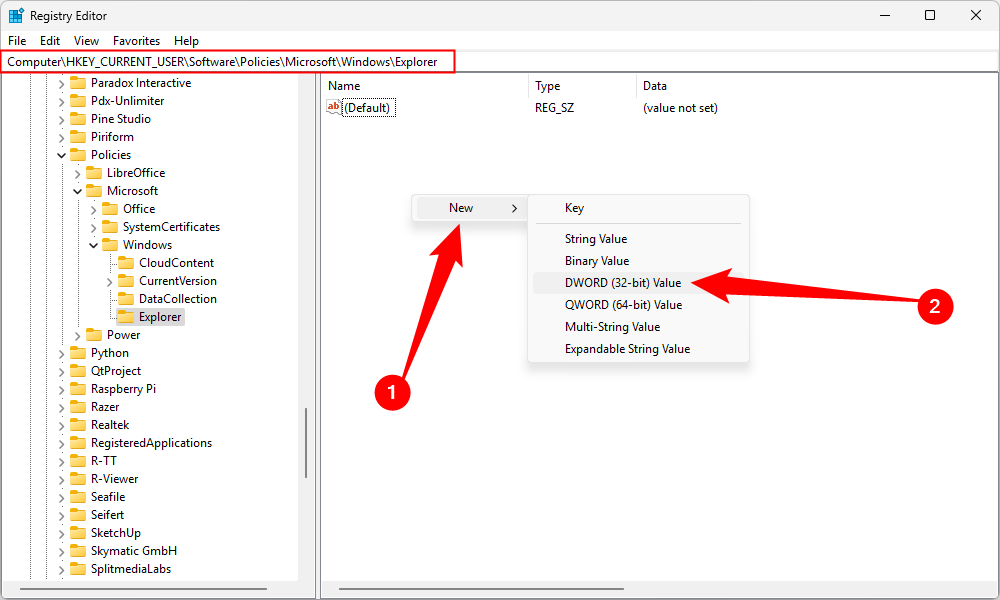
Within the Explorer key, right-click and select New > DWORD (32-bit), and type DisableSearchBoxSuggestions in the field.
Once that is done, double-click “DisableSearchBoxSuggestions” and set the value to 1, which corresponds to True or Enabled.
With that done, Bing should be gone from your Start Menu as soon as you restart your PC. To re-enable Bing search, just change that value back to 0.
The right-click context menu has been a staple of Windows since the beginning, and it received a significant redesign in Windows 11. Despite improvements since Windows 11’s release, like bigger copy and paste buttons, decades of habit still leave me partial to the “old-fashioned” right-click context menu.
6 Old Windows Apps and Features You Didn’t Know Are Still Around
These old apps and features are still useful.
Once again, there is no built-in way to disable the new menu, but you can do it through the Windows Registry.
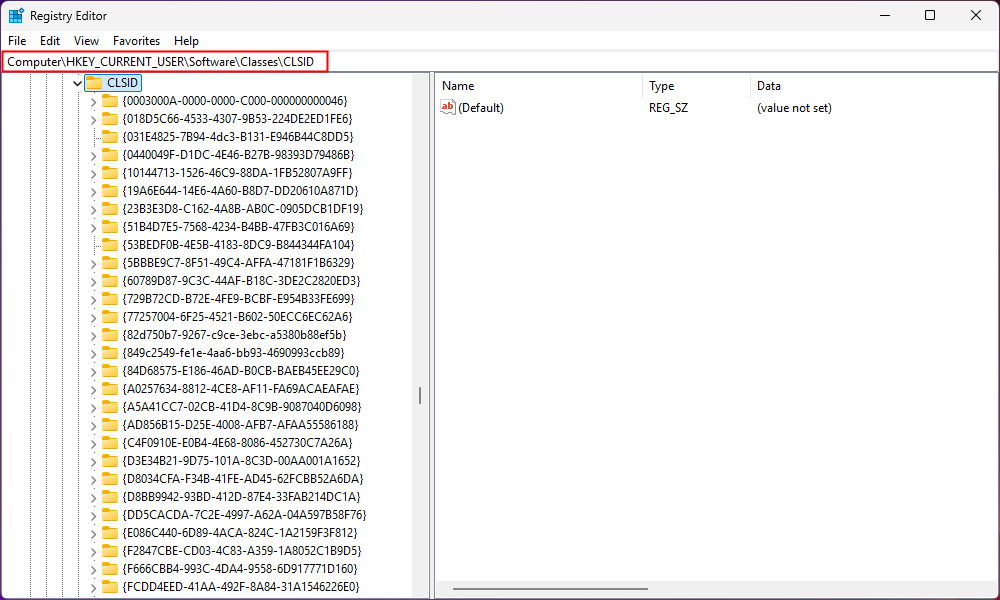
Tap the Windows key, then search for Windows Registry. Navigate to Computer > HKEY_CURRENT_USER > SOFTWARE > CLASSES > CLSID or enter the following path in the address bar:
Computer\HKEY_CURRENT_USER\SOFTWARE\CLASSES\CLSID\
Once there, right-click empty space and select New > Key, then paste the following in the name field:
{86ca1aa0-34aa-4e8b-a509-50c905bae2a2}
Open that up so that your full path at the top reads Computer\HKEY_CURRENT_USER\SOFTWARE\CLASSES\CLSID\{86ca1aa0-34aa-4e8b-a509-50c905bae2a2}, then right-click empty space and go to New > Key, and name the new key InprocServer32.
Open up the InprocServer32 key, and note that Default shows (value not set). Double-click the entry, put nothing in the value data field, then click “OK.” When you’re done, the Data column should show nothing rather than (value not set).
Once that is done, all you need to do is restart File Explorer, and you’ll be back to the old-fashioned right-click context menu. Alternatively, you can just restart your PC. It’ll accomplish the same thing.
To restore the modern Windows 11 right-click menu, right-click and delete “InprocServer32,” then restart File Explorer again. It’ll come back.
Disable the Lock Screen
Though I lock my computer frequently, I don’t actually use the lock screen. It is just another thing in the way when I need to log back in, so I disable it entirely immediately whenever I set up a fresh install of Windows 11.
Click the Start button, then search for Registry Editor.
Once the Registry Editor is open, navigate to:
Computer\HKEY_LOCAL_MACHINE\SOFTWARE\Policies\Microsoft\Windows
Next, create another registry key within the Windows key. Right-click the “Windows” key, then go to New > Key, and create a new key Personalization.
Select the “Personalization” key, then right-click empty space and go to New > DWORD (32-Bit). Set the name of the DWORD to NoLockScreen, then double-click it and set “Data Value” to 1.
Now any time you log in, you can just enter your password.
How to Edit the Windows Registry from the Command Prompt
Windows and a lot of third-party apps store its settings in the registry. If you’re wanting to edit the registry, you can do so from the Command Prompt.
While registry tweaks are a decent way to customize how your PC operates, they aren’t the best way to customize its appearance. For that, you’ll have a much easier time using third-party utilities instead.

